warning: long post
 first of all, have you all seen how my husband did this frame? (and how cute our cat is...awww)
 first of all, have you all seen how my husband did this frame? (and how cute our cat is...awww)
now, for a "diy". i dont know if this qualifies as a "diy," but whatever. as you might know, i love doing my nails. and i can get a similar result from doing myself as if i got a professional manicure, which i love. [if i am not writing proper english, i apologize, i am sickly w/a horrid cold]. anyways, i got this idea after reading all these nail blogs (there are TONS! who knew!?) and i saw one where a girl used a heart sticker and then peeled it off...found at this post on the blog polish hoarder disorder (phd). of course bloggers like her have all sorts of cool tools and stamps and things i've never heard of, but i make do.
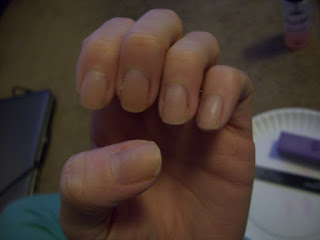
i apologize in advance for the poor quality of these photos. the lighting in my house is sucky and the flash was too bright. but here goes!
i apologize in advance for the poor quality of these photos. the lighting in my house is sucky and the flash was too bright. but here goes!
 2. file/shape your nails
(i would have kept them longer but i broke one the other day and all my nails have to be the same length. i dont like it when they arent)
 [with top coat. i apply a lot.]
then, WAIT FOR YOUR NAILS TO DRY
they have to be completely dry for the next step or you'll mess it up [done it before, believe me!]
 6. using scotch tape, tape off your nail diagonally, so about half your nail is covered.
[they don't have to be in the exact angle on every finger, it will still look cool]
 7. apply a darker color on your nails. i used ulta's "socialite" (2 coats)
[i put a base coat first and then the darker color, but idk if that's necessary].
 since you applied such a thick top coat over the light color, you can use this method to clean up any parts of the dark color that bled over so you can have a straight line
9. once your line is straight like you want it, apply top coat again
 10. apply something to make your manicure fast dry. i use beauty secrets nail matrix, which is both a cuticle oil and an instant polish dryer
 voila!
(ew i have ugly hands, sorry, i wasnt meant to be a hand model)
[i still have the nail matrix on which is why it looks all oily and stuff]
here are some links to fab nail blogs to check out: little music boxes; getcha nails did; nailin' it; lacquerized (linked above as well); i ♥ nail polish; the daily nail; r3 daily; polish hoarder disorder (linked above as well); all lacquered up; f yeah nail art (warning: language), and there are many, many more out there!
i hope this wasnt too boring! did you like it?


4 comments:
oh i'm so glad you posted how to do that! i always want to do my own but get too scared, and when i saw your first picture i was real jealous. i am so trying this :)
do it!!
I love your bright pink nails :) I can never do it myself that well!
FUN! Thanks for coming to my blog and entering my giveaway! You're just in time too - ends in less than hour! Winner will be announced tomorrow. Good luck!
Post a Comment